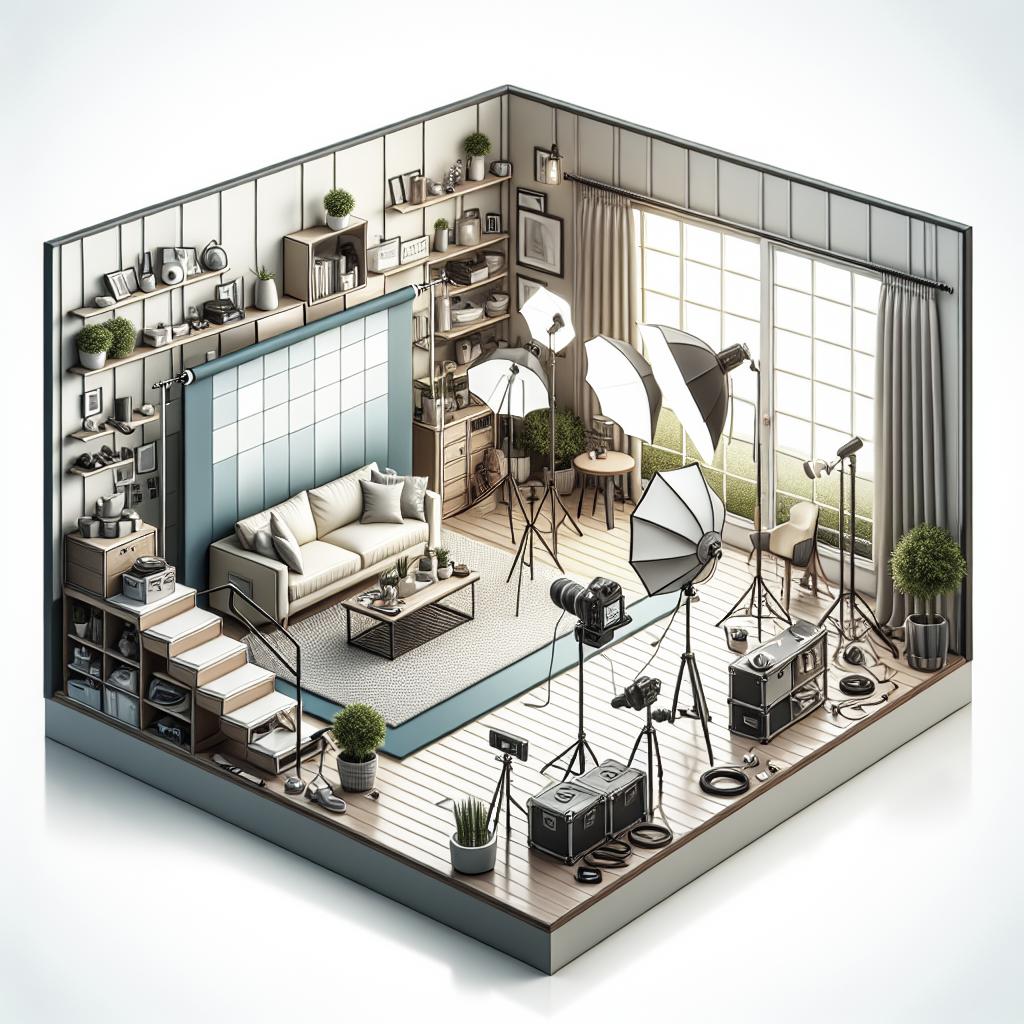
Setting up a home photo studio might seem like a daunting task, especially if you’re working with limited space. However, with the right choices in equipment and organization, you can create a professional setup from the comfort of your home. This blog post will guide you through selecting the best backdrops and materials, positioning them efficiently, choosing between flash and continuous lighting, picking the ideal softboxes for your setup, and selecting the right accessories to complete your home studio. By the end of this post, you’ll have all the information you need to set up a home photo studio, whether you have ample space or a tiny corner to work with. Dive into the details below to transform your space into a creative haven.
WATCH THE VIDEO OR KEEP READING TO SEE EVERYTHING YOU NEED TO SET UP YOUR OWN HOME PHOTOGRAPHY STUDIO EVEN IN A SMALL PLACE
Creating a home photography studio can be accomplished with some strategic planning and thoughtful purchase decisions. Whether you are a professional photographer or a hobbyist, the key is understanding what you need and how to maximize your available space. From backdrops to lighting and necessary accessories, this post covers it all.
Which Backdrop to Get?
Choosing the right backdrop is crucial because it sets the tone and style of your photographs. Options range from plain muslin sheets to patterned vinyl rolls. Solid colors like white, black, and gray are versatile choices that can be used for various types of photography, including portraits and product shots. For a more artistic touch, consider getting textured or themed backdrops. Vintage wood panels, brick walls, and ethereal clouds can add an extra layer of creativity to your images. It’s essential to consider the types of photography you’ll be doing most often and select your backdrops accordingly.
What About Backdrop Material?
The material of your backdrop is just as important as its color and pattern. Muslin backdrops are popular due to their durability and ease of maintenance. They are either hand-painted or dyed and can endure frequent use without significant wear and tear. Vinyl backdrops, on the other hand, are excellent for their glare-free finish and easy cleaning. These are especially useful for product photography because they provide a clean, consistent background. Paper backdrops are another alternative; they are affordable and come in a wide range of colors, though they may not be as durable as muslin or vinyl.
Locating Your Backdrops
Where you place your backdrops can significantly affect your overall setup. Ideally, they should be positioned away from natural light sources to minimize unwanted shadows. Using a backdrop stand or wall-mounted system can help ensure they’re securely fixed and wrinkle-free. If you’re working in a small space, consider retractable backdrops that roll up when not in use. This can help you manage your workspace more efficiently. Additionally, you can use corner areas to hang your backdrops, creating a seamless background for your shots without requiring much room.
Lighting: Flash or Continuous Light?
Lighting is perhaps the most critical element in any photography setup. The choice between flash and continuous lighting depends on your specific needs. Flash lighting is excellent for freezing motion and is more powerful, making it ideal for capturing detailed shots in low light conditions. Continuous lighting, on the other hand, provides a constant light source and allows you to see exactly how the light will affect your shot in real-time. This can be more user-friendly for beginners and is often used for video shoots. Both options have their pros and cons, so it’s worth experimenting to see which works best for you.
Best Softboxes: Size and Shape
Softboxes help diffuse light, creating a softer, more even light source. The size and shape of your softbox will depend on your space and the nature of your subjects. Larger softboxes provide softer light and are suitable for full-body portraits, while smaller ones are ideal for headshots or product photography. Hexagonal or octagonal softboxes offer more even light distribution compared to square or rectangular ones. Consider getting multiple sizes and shapes to add versatility to your studio. Remember, the goal is to minimize harsh shadows and highlight your subject effectively.
Accessories
Accessories can elevate the functionality of your home studio. Reflectors are essential for bouncing light to fill in shadows and can be especially useful when working with natural light. Choose reflectors with different surfaces like white, silver, and gold to manipulate the light creatively. Cable management is another important aspect. Loose cords can be a safety hazard and make your space look cluttered. Invest in cable organizers to keep everything tidy. Additionally, consider a tripod with a flexible head for your camera to ensure steady, well-framed shots.
Future Prospects
In conclusion, setting up a home photo studio is entirely feasible, even in a small space. By carefully selecting your backdrops, understanding the differences in backdrop materials, strategically positioning your equipment, choosing the right type of lighting, and equipping your studio with essential accessories, you can create a versatile and professional photography space at home. Stay updated with market trends and continuously improve your setup for better results and creativity.
| Element | Key Points |
|---|---|
| Backdrops | – Choose solid colors for versatility – Textured backdrops for creative shots |
| Backdrop Materials | – Muslin: Durable, versatile – Vinyl: Glare-free, easy to clean – Paper: Affordable, wide range of colors |
| Backdrop Location | – Use backdrop stands or wall-mounted systems – Consider retractable options for small spaces |
| Lighting | – Flash: Powerful, freezes motion – Continuous: Constant light, beginner-friendly |
| Softboxes | – Large for softer light – Hexagonal/octagonal for even distribution |
| Accessories | – Reflectors, cable organizers, tripods |
Sign Up to My Creative Newsletter for Even More Tips! 🙂
By joining my creative newsletter, you’ll gain access to even more tips, tricks, and trends in the world of photography and creative arts. Sign up today to stay inspired and keep your skills sharp!