—
Photographing the moon can be one of the most rewarding experiences for photographers, beginners, and professionals alike. However, capturing a stunning, sharp image of the moon requires more than just pointing your camera at the sky. This blog post covers everything you need to know, from understanding moon phases and the basics of moon photography to the best gear and settings. We’ll also dive into advanced topics like capturing Earthshine, the Supermoon, and post-processing techniques. By the end of this guide, you will be well-equipped to photograph the moon in all its celestial glory.
Everything you need to know about getting a sharp image of the moon
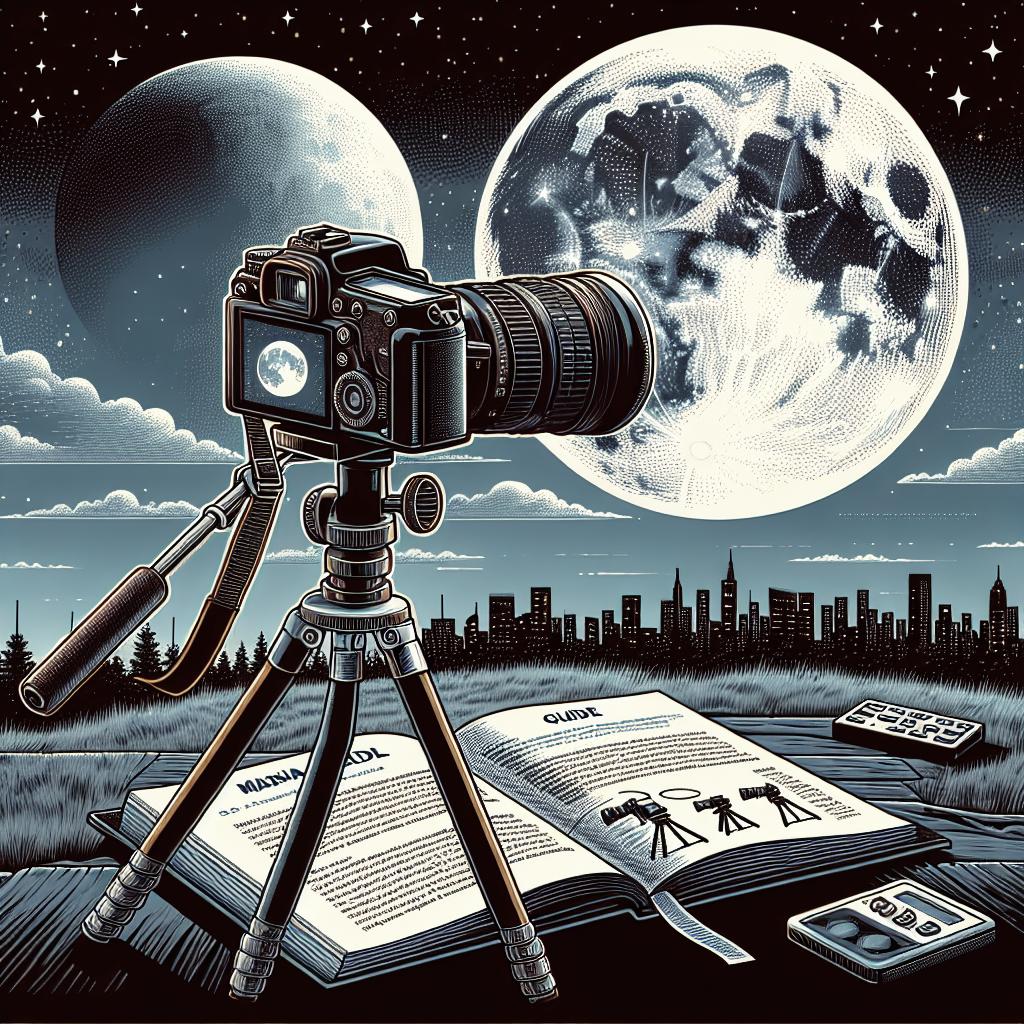
Taking sharp images of the moon requires a combination of good equipment, proper settings, and planning. Unlike terrestrial objects, the moon is constantly moving across the sky, necessitating a stable setup and quick adjustments.
Utilizing a tripod to stabilize your camera is crucial for clarity. Selecting the right camera settings including ISO, aperture, and shutter speed can significantly impact your photograph’s sharpness. Additionally, careful focusing and addressing atmospheric conditions play roles in achieving a sharp image.
Moon Photography Challenges
Moon photography presents several challenges, not least of which is the moon’s constant motion. As the moon moves across the sky, longer exposures can introduce motion blur, requiring photographers to use shorter, adequately set exposures.
Light pollution and atmospheric distortion may also reduce photo quality. Urban settings often introduce artificial lights that can overpower the moon’s soft glow, while atmospheric turbulence can blur the fine details of the lunar surface.
Moon Phases Explained
The moon transitions through different phases as it orbits Earth, ranging from New Moon to Full Moon. These phases affect the moon’s visibility and position in the sky.
Highlighting the waxing and waning phases, understanding these patterns can help you anticipate the optimal times for moon photography. Each phase presents unique opportunities and challenges, influencing illumination and crescents.
What is a Supermoon?
A Supermoon is a phenomenon where the moon appears larger and brighter in the sky due to its closer proximity to Earth in its orbit. This offers a unique opportunity for photographers to capture stunning lunar images.
Occurring a few times a year, Supermoons bring the moon approximately 14% larger and 30% brighter than regular full moons. Planning and understanding these occurrences can yield spectacular photographs.
What is a Lunar Eclipse?
A lunar eclipse happens when the Earth comes between the Sun and the Moon, casting a shadow on the Moon. This event can be partial, total, or penumbral, each presenting different photographic opportunities.
Total lunar eclipses, also known as “Blood Moons,” feature the moon taking on a reddish hue. Capturing these rare events requires meticulous planning and precision.
Full Moon Names
Various cultures have named full moons based on seasonal events, agricultural activities, and myths. These names, like “Harvest Moon” and “Hunter’s Moon,” add a rich context to moon photography.
Each full moon name encapsulates a unique time of year, potentially influencing the landscape and atmospheric conditions for photography, offering diverse contexts for your captures.
Moon Photography Basics
Understanding the basics of moon photography involves mastering your camera settings. Using lower ISO can minimize noise while an aperture around f/8-f/11 offers a balance between sharpness and light intake.
Setting your camera to manual focus and using a remote shutter release or timer can reduce camera shake, resulting in sharper images. Always shoot in RAW format to retain maximum detail.
How to Photograph the Moon (with foreground)
Incorporating foreground elements like trees, buildings, or landscapes can create more dynamic compositions. This method adds context to the image, showcasing scale and enhancing visual interest.
Capturing the Moon in Daylight Conditions
Photographing the moon during daylight offers a higher contrast between the moon and the blue sky, highlighting craters and surface details. Adjust exposure to avoid washing out the lunar features.
Capturing the Moon in Low-Light Conditions
Low-light conditions require longer exposures and lower ISO to prevent noise. A sturdy tripod and a remote shutter are essential to avoid camera shake during these long exposures.
Photographing Close-Up of the Moon
Capturing close-up shots of the moon requires either a powerful lens or a telescope. Telephoto lenses around 300mm or higher enable detailed shots of the lunar surface.
Manual focus is crucial for clarity. Utilize live view mode on your camera for precise focusing. Use a high shutter speed to avoid overexposure, balancing ISO and aperture settings accordingly.
Moon Phase Considerations
Different moon phases offer varying lighting conditions and subjects. The first and last quarters highlight shadows on craters and mountains, while full moons emphasize lunar seas.
Planning your shoots around specific phases can match the desired effect you seek to achieve, such as capturing intricate details in crescent moons or the brightness of a full moon.
How to Plan for Photographing the Moon
Check Weather Forecasts
Successful moon photography relies heavily on clear skies. Checking the weather forecast ahead can prevent wasted trips and frustration, ensuring optimal shooting conditions.
Use Apps and Websites for Planning
Utilize moon phase apps and websites to identify the best times for shooting. Tools like The Photographer’s Ephemeris help plan shots based on moonrise and moonset times, and lunar phases.
Work on Composition
Composing your moon shot involves finding interesting foreground elements and aligning them with the moon’s path. Utilize rules of composition to create balanced, engaging images.
Prepare Camera Gear and Test
Ensure your camera gear is prepared and tested before heading out. Check batteries, memory cards, and lenses to prevent any technical issues from disrupting your shoot.
Best Camera Equipment for Moon Photography
Camera and Lens
A DSLR or mirrorless camera with a telephoto lens is ideal for moon photography. Lenses with focal lengths of 300mm or more are recommended for detailed images.
Tripod and Accessories
A sturdy tripod is essential to maintain stable, sharp shots. Additionally, accessories like remote shutter releases or intervalometers can minimize camera shake during long exposures.
Equatorial Tracker
Equatorial trackers can compensate for the Earth’s rotation, keeping the moon centered in your frame over longer periods, allowing for crisper, detailed shots without manual adjustments.
Best Camera Settings for Photographing the Moon
Aperture settings around f/8-f/11 balance light intake and depth of field. Shutter speeds between 1/125 and 1/250 seconds can freeze the moon’s motion. An ISO setting around 100-400 keeps images noise-free.
Experiment with these settings to suit your specific conditions, adjusting based on ambient light and desired outcomes. Using manual mode allows for greater control over your shots.
How to Focus on the Moon
Achieving sharp focus on the moon is best done using manual focus. Utilizing live view and zooming in can help pinpoint the lunar surface’s focus, ensuring crisply detailed images.
Autofocus can struggle in low light or against a bright subject like the moon, making manual adjustment crucial. Taking multiple shots and refining focus each time can perfect your results.
Looney 11 and Exposure Issues
The “Looney 11 Rule” suggests that for photographing the moon, an aperture of f/11 with an ISO of 100 and a shutter speed of 1/125 second is a good starting point for exposure.
This rule simplifies settings but can be adjusted based on specific lunar conditions and desired image brightness. Ensuring correct exposure prevents detail loss and enhances image quality.
How to Photograph the Supermoon
Photographing a supermoon involves the same principles as regular moon photography but with potentially brighter results due to its increased brightness and size. Extra planning yields dramatic shots.
Utilize lower ISO settings and faster shutter speeds to handle the additional light. Capturing foreground elements can emphasize the supermoon’s scale, creating memorable compositions.
How to Capture “Earthshine”
Earthshine occurs when sunlight reflected from Earth illuminates the dark side of the moon. Capturing this phenomenon requires longer exposures to reveal the subtle glow.
Using a lower ISO and a steady tripod are essential. Combining exposures can balance the illuminated and shadowed sections, creating a harmonious image that showcases Earthshine.
Photographing the Moon with a Phone
How to Photograph the Moon with Your iPhone
Modern iPhones offer impressive cameras capable of moon photography. Utilize the Pro mode to manually adjust settings like ISO, shutter speed, and focus.
An external telephoto lens attachment can improve zoom capabilities, while using a tripod stabilizes the phone, ensuring sharper images. Use apps like NightCap for detailed adjustments.
How to Photograph the Moon with an Android Phone
Android phones with manual camera settings can also capture the moon effectively. Set ISO around 100-200, with a shutter speed between 1/125 and 1/250 seconds, and use manual focus.
External lens attachments and tripods can enhance image quality. Apps like Camera FV-5 give Android users granular control over shooting parameters, aiding in capturing crisp moon photos.
Exposure Differences – Case Study
Studying various exposure settings’ impacts can improve your moon photography. For instance, using different ISO and shutter combinations in similar conditions reveals how subtle adjustments affect image quality.
This case study approach helps understand balancing light and detail. Comparing results from different settings aids in mastering exposure techniques for optimal moon photography.
Post-Processing Your Moon Photos
Post-processing fine-tunes your moon photographs. Software like Adobe Lightroom or Photoshop enables users to adjust exposure, contrast, and sharpness to enhance details and colors.
Noise reduction techniques in post-processing can further clean up images shot at higher ISOs. Enhancing clarity and detail can turn a good moon shot into an outstanding one.
Moon Photography FAQ
A Frequently Asked Questions section can address common concerns and solutions, such as best times for moon photography, gear recommendations, or troubleshooting focus issues.
Providing concise answers and tips helps readers quickly grasp essential aspects of moon photography and resolve common challenges.
Summary of Steps to Photograph the Moon
1. Plan your shoot by checking moon phases and weather forecasts.
2. Use a DSLR or mirrorless camera with a telephoto lens.
3. Stabilize your camera with a sturdy tripod.
4. Set manual focus for sharp images.
5. Adjust camera settings: lower ISO, appropriate aperture, and shutter speed.
6. Experiment and review your shots.
7. Edit and post-process for best results.
Related Articles
Advanced Techniques in Astrophotography
Understanding Night Photography
Best Apps for Landscape Photographers
Lessons learned:
| Section | Summary |
|---|---|
| Understanding Moon Phases | Knowing moon phases helps plan ideal shooting times and conditions. |
| Best Camera Settings | Optimal settings involve balancing ISO, aperture, and shutter speed for clarity. |
| Choosing the Right Equipment | A DSLR camera with a telephoto lens and a stable tripod is essential. |
| Post-Processing | Editing tools can enhance image quality, clarity, and details. |
| Advanced Techniques | Handling special phenomena like Supermoons and Earthshine requires specific methods. |
| Planning and Preparation | Planning with apps and checking weather forecasts ensure successful shoots. |
“`


